Saturday, 25 September 2021

Front drum to disk conversion - Part 1

 Getting ready with parts.

The next main job to be done on the Mustang is to replace the front non power assisted drum brakes with power assisted disk brakes. While the drums work fine, disk will be better. The drums certainly give the leg mussels and workout.

I initially decided to source a full kit from the US. The kits are made up of new master cylinder, booster, callipers, disks and adapters to mount the callipers on the existing drum spindles. 

Well, that was the plan. Upon investigation, I could get a kit from Griffs in Ballarat, however, the booster was going to be anodised and not the correct type for a 71-73 Mustang. The price for the kit was around $1600. I checked other suppliers that could sell me a kit with the correct booster, however the price for those kits were above $2100. As my main reason for purchasing the kit was to get the near correct booster, I decided that I should investigate just getting a correct booster and master cylinder from Custom Mustangs and just purchase parts from local wreckers for new spindles and callipers.

I found that I could get a new near correct booster and master cylinder cheaper than buying booster from a wrecker and have it rebuilt and then buy a new master cylinder. So I ordered the master cylinder / booster from Custom Mustangs in Carrum.

Here is an original booster and master cylinder.


Here is the kit from Custom Mustangs. It is not exactly the same but not far off.

I then checked with wreckers and found that I could buy a new pair of spindles and alloy Girlock callipers from an 1986 / 1987 XF Falcon that are single piston and simple design. These would cost around $350. I could also source spindles and callipers from an XC / XD Falcon that are a cast metal design for about $250. In talking to the local brake shop expert he suggested that the alloy XF callipers would be better as they are more reliable.
Upon searching Facebook marketplace, I found a set of XF callipers and spindles for $150 in Melton. So I jumped into the Mustang and went for a spin to Melton.
The guy had just removed them from a XF Falcon and came with the upper and lower control arms with springs and disks still assembled. I advised I did not want / need the upper and lower arms, so we removed the upper arms from the set up on site and I returned home with the rest of the parts to continue disassembly at home.
After a quick pressure wash, I disassembled the parts and binned all the bits I did not need. 
The disks were in good condition all be it a bit rusty but with in tolerance. Unfortunately, Ford changed to a larger 70.8mm front hub design in around 1976, so the disks had 70.8mm hubs and the wheels I have on the car have 60mm hub holes, so I can not use the disks that came with the parts.

Once disassembled, I set about removing the old brake fluid from the callipers and removing the pistons. I used compressed air to gently push the pistons from the callipers.

Here are a bunch of pictures showing the front spindle and callipers both together and separated.


My good make Russell also has a Mustang and he also has a sand blaster, so the next step is to go and sand blast the parts to clean them up. Then go to the local brake parts shop to source new front disks, bearing and calliper rebuild kits, plus new tie rod ends as the size of the bolt is slightly different.

I will then rebuild the front ends while not in the car so as to make the install simpler. (Hopefully!). 


Saturday, 18 September 2021

Repair right side mirror

 Mirror repair

The next job on the list was to repair the right hand side mirror. The issue with the mirror was that it would not stay in the set position as the ball in the back of the mirror no longer maintained pressure on the flexible plate in behind the mirror.

I ordered a replacement mirror from Custom Mustangs with the view that if I needed to break the original mirror to open up the pressure assembly then I had a replacement.

The replacement mirror I ordered was a newer style convex mirror. This will enable me to see into the very large blind spot that the car has due to the large rear quarter and driving on the left.

I removed the mirror assembly from the mirror casing and then tried to gently pry off the original mirror. Fortunately it came away easily and did not break.


 I then drilled out the rivets holding in the pressure plate assembly.

I then used a hammer to push the centre of the plate where it contacts the ball so that it would apply more pressure on the ball.

I then drilled holes into the old cast in posts with the view to add screws. This did not work as well as planned as the holes in the posts ended up to close to the side wall of the post and that made it impossible for screws to be installed.

I then spun the assembly around a 1/4 of a turn and drilled holes directly into the backing plate. I then added longer screws through the holes into the backing plate. this now applies enough pressure to stop the mirror from moving, but enough freedom to enable the mirror to be moved to the desired location.


As the back of the mirror cant be seen once installed, it does not matter that the screws protrude a little.
I then used clear silicon to install the original mirror and then more clear silicon to install the newer convex mirror.

Now I need to wait for the silicon to set and dry, then reinstall with the single screw and set into position.

My next large job is to replace the front drum brakes with disk brakes.
I have been able to source a new booster and master cylinder that is period correct for the 71-73 Mustang. My plan is to source replacement front spindles and callipers from a wrecker from a locally built XC or later V8 Fairlane / Falcon / LTD. I will then service the callipers, purchased new bearings and disks and set about installing the parts. I just need to wait for lock down 6.0 in Melbourne to end to enable me to go and collects the parts.

Stay tuned. 


Saturday, 4 September 2021

Thermostat and Vacuum temp sensor switch replacement

 A few more jobs.

A few weeks ago I ordered a replacement Vacuum switch that turns on and off the vacuum advance on the distributor when the engine is cold. The one in the engine has a broken port and was not serviceable.

In order to replace the sensor I needed to remove the alternator bracket and alternator in order to get a spanner onto the sensor due to its location. I had been putting this job off as the fan needed to come off and the fan pully in order to get to the alternator brackets. In the mean time I ordered a replacement water temp thermostat and thermostat housing. While the engine seemed to be keeping itself cool enough, I wanted to be sure it had the right thermostat in the engine. Plus the housing was a bit rusty, so I decided to replace both. 

Here is the old vacuum / water temperature switch. Note, it should have 3 outlets, however, one has been broken off. 


Fortunately, the XE Falcon fitted with the 351 Cleveland also used the same type of switch so was able to source one locally on ebay.

Here is the new one installed. Note the alternator and brackets have been removed.


As part of this work I researched the type of thermostat needed for the cleveland. While a standard type does work, it is suggested to use a low flow type. Unfortunately these are not available off the shelf from most car spares places, so I found and ordered one on ebay. The Dayco 180Deg F (or 80 Deg C) thermostat from Repco and Autobarn was $98. The one I found on ebay was $45 including shipping.. So a order was placed.

Here is the old thermostat and housing.

Here is the new housing and thermostat.


As part of the install it also also recommended that a restrictor place be installed in the block just under the thermostat. As these are made from brass and about $90 I decided to not order one and just see if the engine has one installed.

Here is what the restrictor plate looks like. (Before installation).

Here is the one that is currently in the block.
Here is the thermostat and new vacuum temp switch installed and reassembly started.


Once all the parts were reinstalled, I reconnected the vacuum pipes back up to the distributor.
As it has a number of solenoids to manage the vacuum timing both when cold and warm, I wanted to get the routing of the vacuum pipes correct.

Here is a diagram showing how it should be. 

I then took the car for a test spin and checked the vacuum pipes and all seems to be working. As the engine is now warm, I cant tell if the vacuum switch is working when the engine is cold so will have to wait till tomorrow to check and see.
Time will tell.

Here is a picture of the engine with all the vacuum pipes connected.


Next task is to get a replacement door hinge pin and bushes to repair the slightly sagging drivers door.


Saturday, 28 August 2021

Transmission service

 Out with the old in with the new

This weekend I set about servicing the FMX transmission.

All the manuals suggest that the trans will take 10L of trans fluid. However, the pan only hold about 4L. I purchased a gasket and filter kit from Just Mustangs some weeks ago and purchased 3 x 4L of Penrite Type F trans fluid from my local Autobarn.

I jacked the car up onto axle stands so I could roll under the car and set about removing the pan from the bottom of the transmission. Fortunately, the new exhaust system was not in the way. 

I located a large tub to put under the pan so that when some of the screws were removed oil would simply drip down into the tub. There is no drain plug in the FMX transmission (unfortunately).

I was pleasantly surprised to find that the trans fluid was in good condition and nice and pink.

I cleaned up the pan, replaced the oil filter in the bottom of the trans and reinstalled the pan and re added about 4L of new trans fluid. Short of removing the transmission, there is no real way to get all the 10L of fluid out of the torque converter, coolant lines and trans. Given the fluid was in good condition, there was not need to go that that extreme. 

There was some sludge build up in the filter and bottom of the pan and this was all cleaned out. Similarly, there is no magnet in the bottom of the pan. So it was hard to tell if there were any metal fragments.

 Here is the old filter.


Here is the trans fluid I used.


I also replaced the coil and removed the 49 year old original one as the engine was developing a miss when warm. The resistance of the original coil was also too high for the electronic points I installed some weeks ago. So now the new coil is in, and no issues so far.

The next task is to replace the thermostat that will happen next week when the parts arrive.


Saturday, 21 August 2021

Shakedown test drive

 Test drive during covid 19 lockdown 6.0 in Melbourne

After completing the spring install yesterday and the coil replacement last week. I had a need to go to Autobarn for a new thermostat, so took the Mustang for a spin the looong way all within my 5km radius of home.

Unfortunately, Autobarn dont stock the high flow 180deg F thermostat I was after. So will have to wait for next week to order and get the parts needed for the job. On the way home I look a scenic route and took a few pictures. The car is running a normal temperature of about 80deg c (176deg f). The temp outside is 18 deg and I have the larger 3 core radiator installed. While the thermostat seems to be doing the job correctly, I feel the need to replace it and the slightly rusty housing so limit issues down the road. 

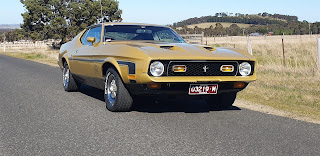
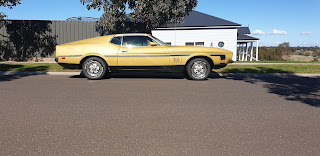
Here are a few pics of the old girl out and about.


So not many jobs to do this weekend.. Just enjoy..


New front springs

 On the level.

I have been thinking about trying to level out the front of the Mustang as it looks like it sags in the bum a bit.

I ordered some new King springs from my local Autobarn. I was going to install some "low"pedders springs but they were out of stock so opted for some "low" King springs. King springs sell a standard, low and super low. I opted for the low's (KFFL-02) with the vide to take about 25mm or more out of the front.


It took me about an hour per side being super careful with my external spring compressors.

Once I have completed the left, the right was simpler as I knew what worked and what did not.

As the springs come supplied with a left and a right, I swapped them around and put the right in the left side of the car etc as the car is still left hand drive and they usually compensate for the driver.. 

Here is one of the original front springs.


The new ones are easier to install as they are slightly shorter (but stiffer). I was able to compress them while they were on the ground with an impact gun and socket rather than a spanner in place in the car.

Here is a pic of the car with the original springs

Here is one with the new springs.

The changes are subtle but the front it lower. The space from the ground to the wheel arch is about the same now.

Next task is to replace the engine thermostat and thermostat housing.


Wednesday, 18 August 2021

Steering wheel repair

 Fixing the cracks.

Now that the car is registered, I have set about fixing some small issues that have popped up due to its age.

The 1st job was to fix the large cracks and missing pieces from the steering wheel. With time and heat, the plastic on the wheel tends to crack and the steel within the wheel does not move. Hence the large chunks and cracks in the wheel.

I used epoxy putty to fill the gaps and then painted the wheel to match the rest of the ginger trim.

Here is the wheel showing the cracks before I started.


Here is the repaired and painted wheel.


While doing a few other jobs and watching a number of videos of other 71-73 Mustangs, I discovered that the crash pad should be ginger on a car that has ginger trim. The crash pad in the car was black. 
I removed the dash pad and found that it is an after market crash pad with California Mustang embossed on the back. So I decided to have a go at painting the crash pad ginger.

It came up fairly well I think.
Here is a picture of the black one.

Here is the painted and installed crash pad.


I think the ginger colour looks better.


The final piece to the AC puzzle

 The last push to finish the AC install. Now that all the engine bay work is done. The next step is to replace the heater box. Also, I have ...