Mustang round up in Dandenong
This year I attended the Mustang round up hosted by the Mustang Club of Australia (Victoria division).
Had a great day with over 450 Mustangs on display.


Mustang round up in Dandenong
This year I attended the Mustang round up hosted by the Mustang Club of Australia (Victoria division).
Had a great day with over 450 Mustangs on display.
Stripe install complete
The stripe install is finally complete just in time for the mustang round up hosted by the Victorian Mustang Club.
As part of the install, I also purchased the lower stripe kit.

.jpg)
.jpg)
.jpg)
.jpg)
.jpg)
.jpg)
.jpg)
.jpg)
.jpg)
Those damaged stripes have to go!
One thnig that has bugged me for a while has been the misalignment of the stripes and the fact that they are damaged / perished in parts.
I decided that I would remove the old stripes and then install some new ones.
.jpg)
.jpg)
.jpg)
.jpg)
Well, the removal process did not go so well or as simply as I thought. I managed to remove the main part of the sripes with a heat gung but they perished as I pulled them off.
What was left behind is the main issue. According to a car painter friend, it looks like when they repainted the car with acrylic they did not let the paint dry and set properly and installed the stripes. This then sucked some of the adhesive into the paint and left a nasty tell tail glue behind. Add to that, a good 30 + years of California and Texas sun baked the glue into the paint also. This is what was left when I removed the stripes.
.jpg)
.jpg)
.jpg)
.jpg)
After a heap of trial and error... I found a process that worked that did not effect the paint on the car. That is, leave the car out in the warm sun for a number of hours, then start with pure eucalyptus oil to get the soft parts off. The eucalytus softened parts that I was able to then scrape off with my finger nail.
I then used an adhesive remover that was a bit stronger called Zof. This worked well to soften some of the glue, then again I used my nail to remove the soften parts. Then finally I found a product called Goo Off from the local hardware store. With some careful and persistent rubbing this removed the remained. But this time I did not use my nail as the goo off softened the paint a but and my nail could then scratch the paint.
This is the final result.
.jpg)
.jpg)
.jpg)
.jpg)
Upon close inpspection, the lines can be seen due to the hot sun fading the paint around the old stripes. The next step is to cut back the paint using a cutting compound to remove the rub marks and install the new stripes.
Needless to say, my right pointer finger is worn out. I ended up getting some thick dish washing gloves and cut the finger off the top of the glove and used that on my finger like a old fashioned rubber thimble. This saved my finger from the chemicales but still have a few blisters from all the rubbing over many hours.
I picked up some locally made stripes in Mildura about 12 months ago but they had been sitting in a warm shed for a number of years so I ater found out that they are not useable.
I purchased a new set of repro stripes from Griffs in Ballarat and will install the new ones at the right height once the cut and polish is done.
Stay tuned.
Disy reinstall
Now the distributor has been rebuilt and recurved to suit more modern fuels, it was then time to reinstall.
Here are a few pictures of the freshly rebuilt distributor with the Pertronix I reinstalled and ready to fire.
The unit has been adjusted to run at 10 to 12deg rather than the factory 6deg and the mechanical advance has been recurved.
.jpg)
.jpg)
.jpg)
Intermittent issue.
For some time now I have been chasing an issue where, after a long run, I would slow to a stop or a roundabout and the engine would start to misfire and stall.
I had checked the carb to ensure it was not leaking fuel.
I checked the plugs and plug leads with no obvious issue.
I checked the voltage on the Pertronix electronic points to make sure that the coil and points were getting the right voltage. I did find an issue here and rewired the ignition system to use a relay to supply full 12v to the Pertronix coil and made it look factory.
I checked the timing and vacuum levels.
The issue was impossible to "make" happen and was intermittent.
I installed an O2 sensor on the exhaust to see what was happening.
When it happened the car would run mega rich and stall but would rev no problem.
Last week the issue happened again and this time with the O2 sensor I could see it want from a slightly lean 15.9 when driving at 100KM/h to 10 and would not move from 10 no matter what I did.
I was able to limp the car home and set about diagnosing the issue.
In talking to my great mate Nev, we determined that the issue must be timing and probably the distributor as this is the only thing I had not changed. Other than going from stock mechanical points to the Pertronix.
I gave the internals a good squirt of WD40 and checked the vacuum advance was working.
We determined that the distributor needed to come out and he would loan me one while I get this original one serviced.
The following are pictures of the distributor when I pulled it out. YUK is all I can say..
On the surface all looks ok.. Right.??
.jpg)
.jpg)
.jpg)
.jpg)
.jpg)
.jpg)
.jpg)
.jpg)
.jpg)
Finally found the right knobs
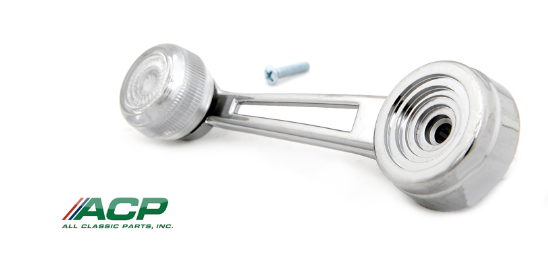
For a while I have been looking to find the correct colour for the window winder knobs in the Mustang and then once I found the right colour, the next challenge was to find replacements.
Per this pic, the original clear knobs had got rather warm over time and had discoloured.
.jpg)
I found the follow line item at Custom Mustangs
.jpg)
.jpg)
.jpg)
.jpg)
.jpg)
.jpg)
.jpg)
.jpg)
.jpg)
The last push to finish the AC install. Now that all the engine bay work is done. The next step is to replace the heater box. Also, I have ...


